

 BMW E38
Summary
BMW E38

Elizabeth de Latour 10 months ago #
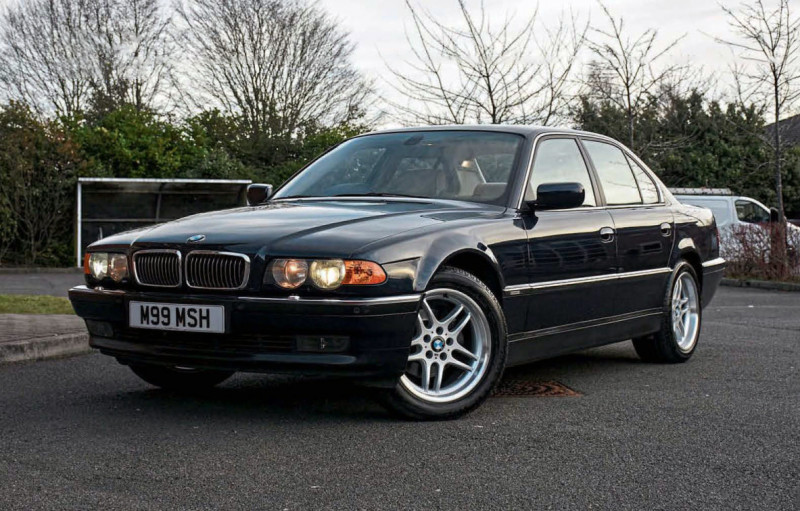
In the last update, I introduced my new purchase of the 2000 E38 735i Individual with 119,000 miles, so here is the next update as I re-live the late 1990s/early 2000s of BMW ownership. Day three of ownership was to give the car its first detail, which I always find quite nervous as there is always something you miss on the bodywork in the excitement of initially going to look at a car to purchase. But I am very happy to report that there was nothing really amiss with the bodywork, with no rust present on the bodywork and actually, the stunning Orient Blue paintwork being in fantastic condition with little to no swirls present. There is some rust, however, in the inner part of the boot, but that is something to look at in the future and applying copious amounts of wax in these inner areas should help for now.
Mani’s BMW 735i E38
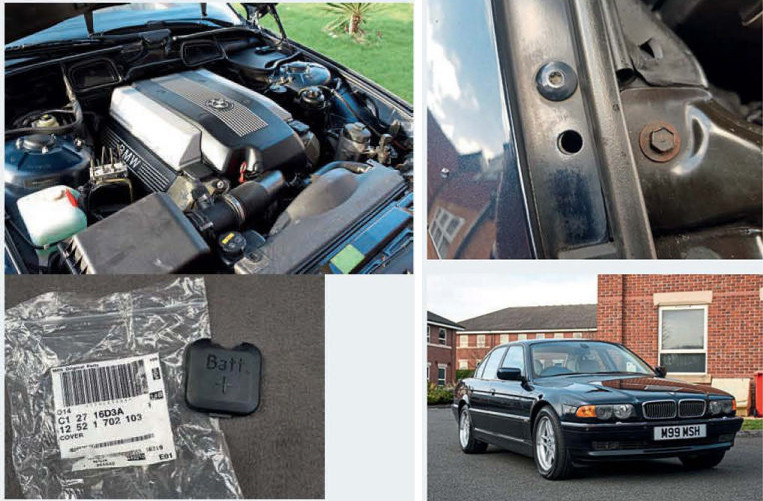
Next was to start to build up a to-do list of everything I needed to do on the car, both in terms of maintenance and preventative maintenance. So, I fired up my trusty Excel and started making a list. 10 minutes later, the list had over 20 items on it, but that was work that I have planned for the next 12-18 months, so I thought that was not too bad. Most of this work has already been budgeted for, so my wallet was relatively calm. One of the things I first spotted when I saw the car was that it was missing a few pieces of engine bay trim. And when I mean a few, I mean specifically the positive battery engine cover, two valve cover trim pieces, and both the headlight/indicator upper cover plugs. Call me Mr OCD, but I like to have all of the trim pieces in place since it finishes the engine bay nicely, and also acts as protection to stop general dirt and detritus getting into these places.
So having popped down to my local dealer and ordered all of the trim pieces, oddly, the cheapest item, which was the headlight/indicator upper cover plugs (less than £2 each), was on backorder and would be a couple of weeks for delivery. No matter, I can live for a few weeks without them. A couple of days later, the positive battery engine cover and two valve cover trim pieces arrived, and while I am not very mechanically minded, even I managed to fit these without a hitch! The engine bay certainly looked a lot better. Small steps and all that.
With self-motivation high following the successful fitting of the trim pieces, the day finally arrived for my car to be sent to my local trusted BMW independent specialist (Auto Technik, Lutterworth) for them to undertake an Inspection II, replace all fluids, provide a general assessment of the car and their own repair list. Now, I had noted that the car was leaking a little fluid at this stage on my driveway, so asked for this to be looked at too. Lots of thoughts were going through my mind as I drove down the M1 to them. Would they say that I have purchased an absolute mint condition E38 where nothing needs attention, or would they provide me with a to-do list that would rival a Britannica encyclopaedia? As it started to rain, I also noticed that the wipers were not overly happy at having to do some work judging by the smearing they were making on the windscreen, so these needed replacing, and rapidly. A few hours later, I received a message that the inspection video was ready to be watched. Now, having been through this experience many times on my E39 and E46, I have generally learnt that the longer the video, the bigger the repairs. So, I looked at the length of the video, which was just under 2 minutes and 30 seconds long. Not too bad, I thought!
The inspection revealed some play in the rear bushes and upper arms. In terms of leaks, this was diagnosed as a gearbox oil leak coming from the sump and output shaft, with a recommendation to replace the output shaft and undertake a gearbox service (the gearbox service was something I had planned to do anyway since there was no evidence of this ever having been carried out). The dreaded one was quite a few oil leaks noted coming from the engine, which required further investigation (though I am sure all M62 engine owners know what this might be…).
The brake hoses were also perished, and starting to split due to their age. So, after digesting the video, I did not think that was overly bad for a car of this age and mileage, and some of the items that needed attention were things I had on my to-do list, so had a budget for. Rust-wise, the bottom of the car was in fantastic condition, just like the body itself. So that is a massive positive. After receiving the full repair bill, I had a chat with the seller, and after some negotiations, we came to a mutual agreement that he would contribute to some of the gearbox works.
As I had to prioritise where I would spend my funds on the car first, I authorised for the gearbox output shaft to be replaced, undertake a gearbox service, replace all of the brake hoses and approve the time for investigating the oil leak. Due to the gearbox parts being on backorder from BMW, all of this would take a couple of weeks to arrive, so I booked the car in for three weeks later. More on these works in the next update! One of the items I mentioned in my last update was that the previous owner had replaced the front and side indicators from amber to clear. Given that clear indicators were only used on the Sport models, I had to change them as I am all about OEM and the factory-fresh look (I also consulted with many people to gauge opinion on amber vs. clear, including our Editor, with the consensus being 50/50 so my survey was inconclusive!). But I decided to stick with originality, so I ordered a set of amber side and front indicators from my local dealer, which were not very expensive at all, but the side ones are on a slight delay, so these would have to wait until they arrive for fitting.

Having fired up YouTube to see how to replace the front indicators, it did not seem too hard at all, especially given that the headlight/indicator upper cover plugs I mentioned earlier were missing. So, I grabbed a screwdriver and stuck it down the hole and loosened the screw, which was holding the indicator in place. A few minutes later, it was loose, and after some quick cleaning in the inner bodywork housing, I fitted the new one. It was really quite remarkable to see how poorly made the seal of the existing aftermarket clear indicator was versus how a brand-new OEM one looks. I then repeated the same exercise for the other side. All in all, quite a quick and very satisfying job. I am sure many people will say that the clear lights look better, but I like the original look, and in a sea of cars that mostly all have clear indicators, it is quite nice to see one with amber lights. And I truly love staring back at it after parking up. In the next update, the specialist gets to work on all of the items mentioned above; identifies the source of the oil leaks; we fix two annoying issues in the boot, and sort out some more trim-related issues.